Bend
Reference
- Mode:
Object and Edit Modes
- Menu:
- Shortcut:
Shift-W
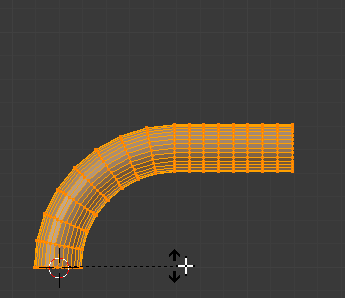
This transformation bends part of the selection into a circle segment. It’s similar to Warp, except that here, the 3D Cursor is on the circle instead of at the center.

Usage
Align the 3D Viewport’s viewpoint to the plane in which the bend should happen.
Place the 3D Cursor at the base of the bend. The geometry around this point will stay in place.
Place the mouse cursor so that the line between it and the 3D Cursor lies along the geometry to bend.
Press Shift-W to activate the tool and move the mouse to bend the geometry.
The distance between the mouse cursor and the 3D Cursor determines the bend radius and how much of the selected geometry is bent (instead of just rotated). Hold Alt to disable clamping and bend all selected geometry instead.
The angle between the original line and the new line determines the bend angle.
Press LMB or Return to confirm, or RMB or Esc to cancel.
Note
Unlike most other transform tools, Bend does not take into account the transform orientation or the pivot point, instead always using the view plane and the 3D Cursor.
Hint
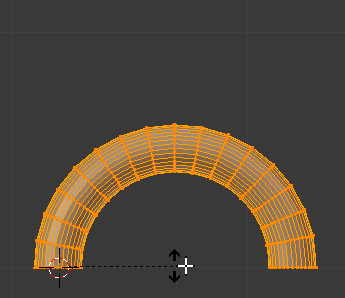
Moving the mouse cursor around the 3D Cursor multiple times will correspondingly bend the geometry over multiple circle revolutions.
Options
Unlike other operators, the Bend operator doesn’t support the Adjust Last Operation panel.
Example

Multiple consecutive bends.